
Canon EOS Rebel T3 Manual⁚ A Comprehensive Guide
Welcome to your comprehensive guide to the Canon EOS Rebel T3! This manual helps you navigate your camera’s features and functions. Discover everything from basic operations to advanced shooting techniques. Explore exposure, focus, color, and lighting. Enhance your photography with this guide.
The Canon EOS Rebel T3, also known as the EOS 1100D, is a digital single-lens reflex camera. It features a 12.2-megapixel CMOS sensor and a DIGIC 4 image processor. This combination delivers high-quality images with fine detail and excellent color reproduction. The Rebel T3 is designed for both beginners and enthusiasts.
This camera offers user-friendly controls and a variety of shooting modes to cater to different skill levels. It is equipped with a high-precision 9-point autofocus system, ensuring sharp and accurate focus in various shooting conditions. The camera also supports continuous shooting at approximately 3 frames per second, allowing you to capture fast-action sequences.
Additionally, the EOS Rebel T3 features Live View shooting, enabling you to compose your shots using the camera’s LCD screen. It also offers High-Definition (HD) movie recording capabilities, allowing you to capture videos with stunning clarity. This manual will guide you through the camera’s features, helping you unlock its full potential and capture memorable moments with ease.
Understanding the Camera’s Key Features
The Canon EOS Rebel T3 boasts several key features designed to enhance your photography experience. At its core is the 12.2-megapixel CMOS sensor, which captures images with rich detail and clarity. Complementing this is the DIGIC 4 image processor, ensuring fast and efficient image processing, resulting in vibrant and accurate colors.
The 9-point autofocus system enables precise focusing, crucial for capturing sharp images, even in dynamic scenes. With continuous shooting at approximately 3 frames per second, you can capture a series of shots, perfect for action photography. The camera’s ISO range allows for versatile shooting in various lighting conditions, from bright daylight to low-light environments.
The Rebel T3 also features a built-in pop-up flash for added illumination when needed. Its LCD screen provides a clear view for image composition and review. Furthermore, HD video recording capability allows you to capture high-quality videos. Understanding these features is essential for maximizing your camera’s potential and capturing stunning photos and videos.
Basic Operations⁚ Getting Started
To begin using your Canon EOS Rebel T3, first, insert a charged battery and a compatible SD card. Turn the camera on using the power switch. Familiarize yourself with the main dial, which allows you to select different shooting modes. Start with the “Auto” mode for fully automated shooting, where the camera handles all settings.
To take a photo, gently press the shutter button halfway down to activate the autofocus system. Once the subject is in focus, the focus point in the viewfinder will light up. Then, press the shutter button fully to capture the image. Review your photos by pressing the playback button. Use the multi-controller to navigate through your images.

To adjust basic settings like ISO and white balance, use the quick control dial and the menu button. The LCD screen will display the current settings. Explore the menu options to customize the camera to your preferences. Remember to consult the full instruction manual for detailed explanations of all functions and settings.

Shooting Modes Explained
The Canon EOS Rebel T3 offers various shooting modes to cater to different scenarios. The “Auto” mode is fully automatic, letting the camera handle all settings. “Creative Auto” provides some control while simplifying complex settings. “Portrait” mode optimizes settings for flattering portraits with blurred backgrounds. “Landscape” mode enhances colors and sharpness for scenic shots.
“Close-up” mode is designed for macro photography, capturing intricate details of small subjects. “Sports” mode uses fast shutter speeds to freeze motion, ideal for action shots. “Night Portrait” combines a slow shutter speed with flash to capture both the subject and background in low light.
“Movie” mode allows you to record HD videos. The mode dial also includes “Program AE” (P), “Shutter-priority AE” (Tv), “Aperture-priority AE” (Av), and “Manual” (M) modes. These modes offer increasing levels of manual control over exposure settings, allowing for greater creative flexibility. Experiment with each mode to understand their effects and find the best settings for your desired results.
Manual Exposure Control
The Canon EOS Rebel T3 offers full manual control, giving you command over aperture, shutter speed, and ISO. This allows precise control over exposure and depth of field. Aperture (f-stop) controls the lens opening, affecting both the amount of light entering the camera and the depth of field. A wider aperture (smaller f-number) creates a shallow depth of field, blurring the background.
Shutter speed determines how long the camera’s sensor is exposed to light. Faster shutter speeds freeze motion, while slower speeds allow more light in, creating motion blur. ISO adjusts the sensor’s sensitivity to light. Higher ISO values are useful in low light but can introduce noise.
To use manual mode (M), set the mode dial to “M.” Adjust aperture and shutter speed using the control dial. The built-in light meter helps gauge exposure. Adjust settings until the meter reads “0” for proper exposure. Experiment with different combinations to achieve your desired creative effects. Understanding the interplay between these settings is crucial for mastering manual photography.
Focusing Techniques
The Canon EOS Rebel T3 offers several focusing techniques to ensure sharp images. Autofocus (AF) is the most common method, where the camera automatically adjusts the lens for optimal focus. The T3 has a 9-point AF system, allowing you to select specific focus points. Single-point AF is ideal for stationary subjects, focusing on a single chosen point.
AI Focus automatically switches between One-Shot AF and AI Servo AF depending on subject movement. AI Servo AF is designed for moving subjects, continuously adjusting focus as the subject moves. Manual focus (MF) allows you to manually adjust the focus ring on the lens. This is useful in situations where autofocus struggles, such as low light or with subjects behind obstructions.
To use AF, set the lens to AF and half-press the shutter button to focus. In MF, set the lens to MF and rotate the focus ring until the subject is sharp. Experiment with these techniques to achieve the best results in various shooting scenarios. Understanding each mode helps capture clear and detailed images.
Working with Live View
Live View on the Canon EOS Rebel T3 allows you to compose shots using the LCD screen instead of the viewfinder. To activate Live View, press the dedicated Live View button on the camera’s rear. This mode is especially useful for shooting from awkward angles or for precise composition. The LCD screen displays a real-time preview of the scene.
In Live View, you can adjust settings such as aperture, shutter speed, and ISO. The display shows the effect of these changes before you take the photo. This makes it easier to achieve the desired exposure and depth of field. Live View also offers focusing options, including Quick Mode, Live Mode, and Face Detection Live Mode.
Quick Mode uses the camera’s regular autofocus system, temporarily interrupting the live view to focus. Live Mode uses contrast-detection autofocus, which is slower but more accurate. Face Detection Live Mode automatically detects and focuses on faces in the scene. Using Live View can enhance your creative control and improve your photography.
Managing Exposure, Color, and Lighting
Mastering exposure, color, and lighting is crucial for capturing stunning photos with your Canon EOS Rebel T3. Exposure controls the overall brightness of your image. Adjust aperture, shutter speed, and ISO to achieve the desired exposure. Aperture affects depth of field, while shutter speed controls motion blur. ISO determines the camera’s sensitivity to light. Experiment with different settings to find the perfect balance.
Color balance can be adjusted using white balance settings. Choose from presets like daylight, cloudy, or tungsten, or use custom white balance for accuracy. Lighting plays a vital role in the mood and quality of your photos. Natural light, such as sunlight or shade, offers different effects. Artificial light, like flash, can be used to fill shadows or create dramatic lighting.
Understanding these elements will allow you to create captivating images that reflect your artistic vision. Use histograms to evaluate your picture. Practice managing these settings to create visually appealing photographs with your Canon EOS Rebel T3.
Troubleshooting Common Issues
Encountering issues with your Canon EOS Rebel T3 is inevitable, but most problems can be resolved with simple troubleshooting steps. If your camera is not turning on, check the battery. Ensure it is properly charged and correctly inserted. If the screen is blank, verify that the camera is not in sleep mode or that the brightness settings are appropriate.
Focusing problems can often be fixed by cleaning the lens or adjusting the autofocus settings. Make sure the lens is securely attached and free of smudges. If your images appear blurry, increase the shutter speed or use a tripod to stabilize the camera. Over or underexposed photos can be corrected by adjusting the aperture, shutter speed, or ISO settings.
If you encounter error messages, consult the manual for specific solutions. For software malfunctions, try resetting the camera to its default settings. Remember to back up your images before performing a reset. Addressing these common issues will ensure a smooth and enjoyable photography experience with your Canon EOS Rebel T3.
Available Resources⁚ Manuals and Downloads
To fully utilize your Canon EOS Rebel T3, several resources are available to enhance your understanding and capabilities. The primary resource is the camera’s instruction manual, which provides detailed explanations of all features and functions. This manual can be downloaded in PDF format from Canon’s official support website, ensuring you always have access to it on your devices.
Canon also offers various software downloads for the EOS Rebel T3, including EOS Utility, which allows you to connect your camera to your computer for image transfer and remote shooting. Digital Photo Professional (DPP) is another valuable download, providing advanced image editing and processing tools specifically designed for Canon cameras.
Furthermore, numerous online tutorials and forums are available, offering tips, tricks, and solutions to common issues. These community resources can provide additional insights and support as you master your Canon EOS Rebel T3. Utilizing these manuals, software, and online communities will maximize your photographic potential.
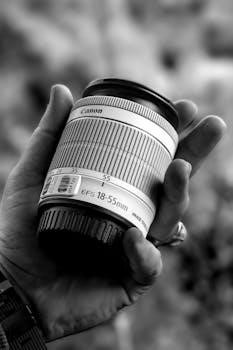
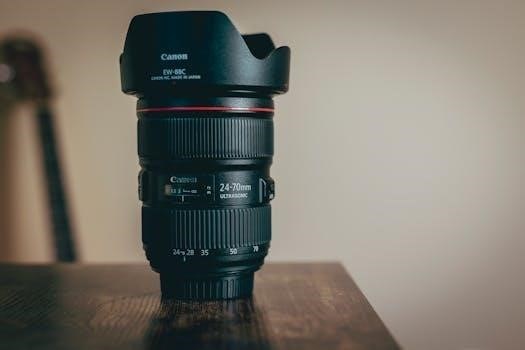
EF-S Lens Compatibility
The Canon EOS Rebel T3 offers versatility through its compatibility with a range of lenses, specifically EF and EF-S lenses. EF lenses are designed for full-frame cameras and are fully compatible with the Rebel T3. However, the Rebel T3 particularly shines with EF-S lenses, which are designed for cameras with APS-C sensors, like the T3.
EF-S lenses are generally smaller and lighter, making them ideal for the compact design of the Rebel T3. They also often offer a wider angle of view due to the crop factor of the APS-C sensor. When choosing lenses, ensure they are either EF or EF-S to guarantee compatibility. Using non-compatible lenses can damage the camera’s mount or internal components.
It’s important to note that EF-S lenses cannot be mounted on full-frame Canon cameras; Always check the lens specifications before purchasing or attaching it to your Rebel T3 to avoid any issues. Exploring different EF and EF-S lenses can greatly expand your creative possibilities.